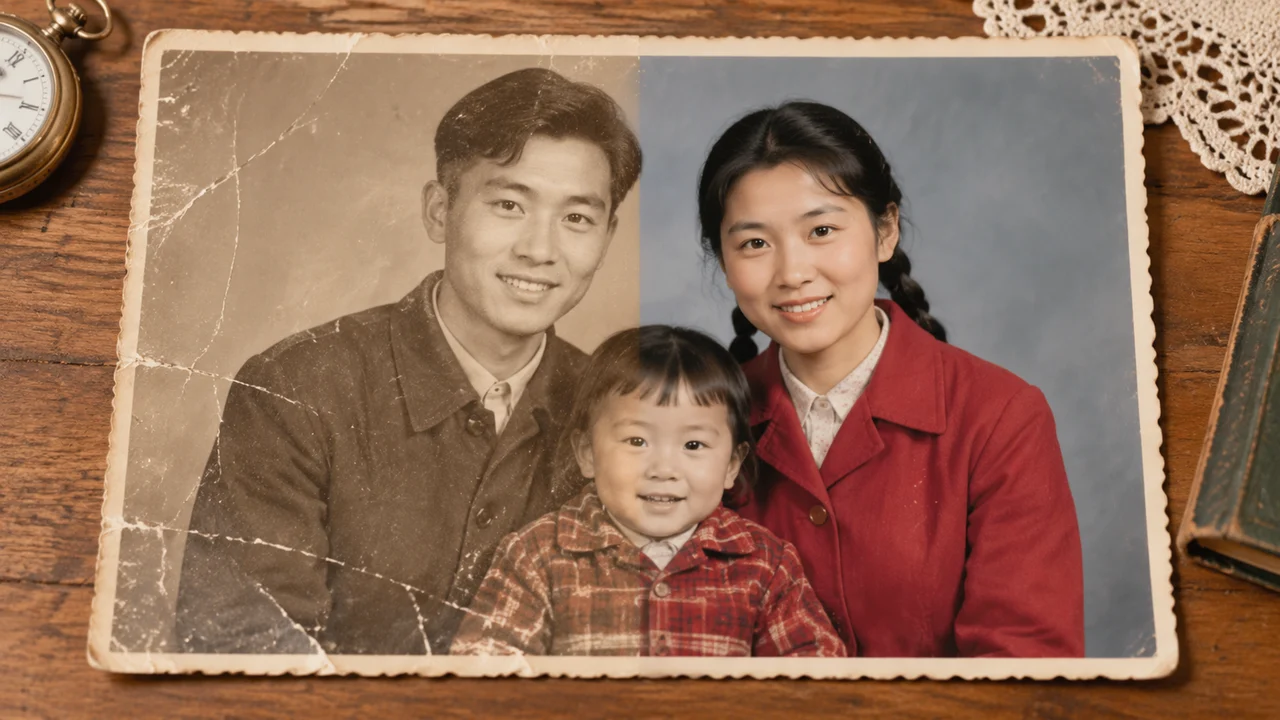
Old family photographs carry irreplaceable history, but decades of storage leave them with paper creases, silver mirroring, chemical fading and dust. The challenge with AI old photo restoration is not merely making a blurry image sharp—it is repairing physical damage while keeping the person’s exact facial identity, expression, hairstyle and period clothing recognizable.
Imagine AI’s Old Photo Restoration tool is built specifically for identity-preserving archival repair. Powered by reference-guided editing models like Nano Banana Pro and Seedream 4, it reconstructs torn edges and faded tonal ranges without turning your grandparents into generic AI portraits.
Why Traditional Filters Fail on Vintage Portraits (and How AI Restoration Works)
Standard sharpening filters amplify paper grain and turn silver scratches into harsh white lines. Conversely, unconstrained text-to-image models often “beautify” vintage faces until they look like modern stock models.
A reliable AI photo restoration workflow separates the job into three controlled layers:
- Structural damage repair: healing fold lines, torn corners, water spots and emulsion scratches;
- Tonal and detail recovery: lifting faded sepia or washed-out highlights while preserving natural skin texture;
- Optional period-accurate colorization: translating monochrome greyscale values into believable skin tones, wool, linen and daylight without neon oversaturation.
Preparing Your Scanned or Phone-Captured Vintage Photo
Before uploading your photo to the , a 30-second check of the source file makes a dramatic difference:
- Avoid angled glare on glossy prints: if you are photographing a physical print with your phone, shoot near a window with indirect daylight rather than using a direct flash that creates a bright white hotspot over the face.
- Trim away excess table borders: use the free browser-based so the photograph fills the frame and the AI concentrates its resolution budget on the subjects.
- Keep the original resolution: do not run heavy mobile beauty filters before uploading; the restoration model uses original grain and shadow edges to reconstruct true facial features.
Step-by-Step Workflow in the Old Photo Restoration Tool
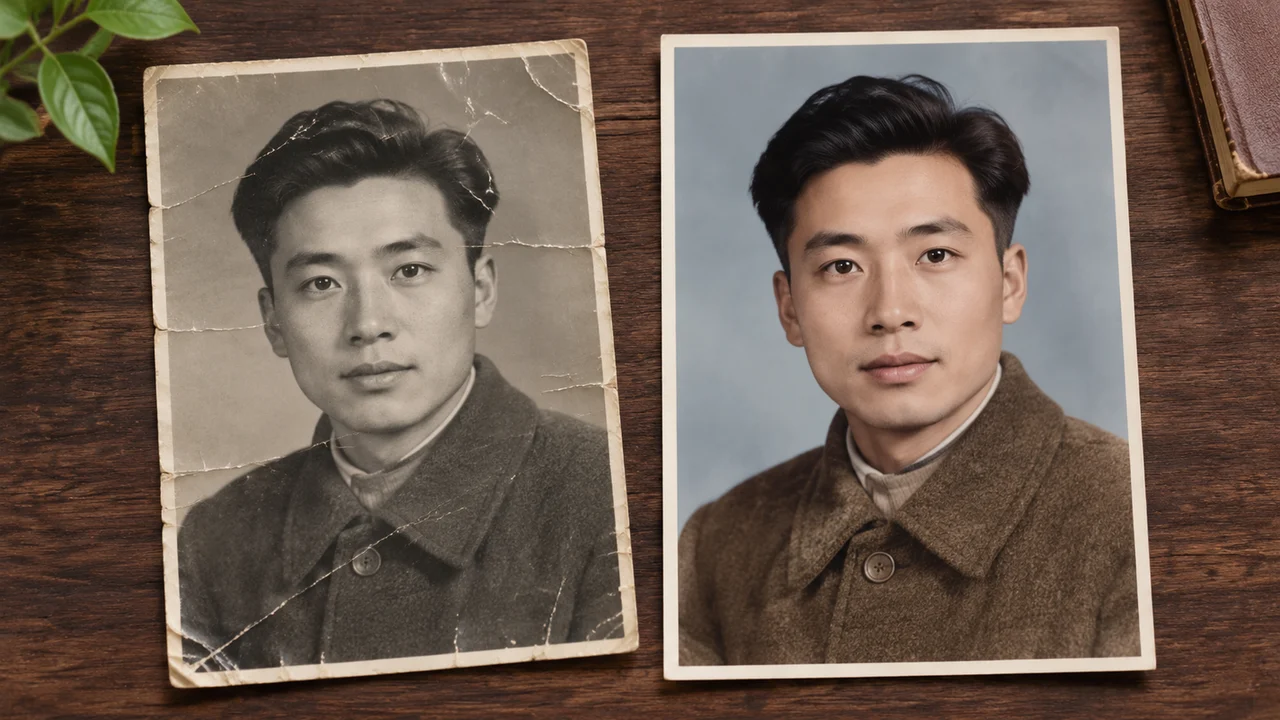
Open the from the and follow this sequence:
Step 1: Upload the Source Photograph
Drop your scanned JPEG, PNG or WebP file into the source slot. The tool automatically applies a preservation-first restoration instruction that locks facial identity, clothing cut and composition.
Step 2: Choose Your Restoration Intensity and Direction
In the additional instruction box, tell the model whether you want a monochrome archival cleanup or a natural full-color restoration:
- For faithful black-and-white or sepia preservation: specify that the original monochrome palette should stay intact while removing creases and fading.
- For natural colorization: ask for muted, period-appropriate color tones and name any known family details (for example, “navy wool uniform” or “warm brown eyes”).
Step 3: Select Resolution (1k, 2k or 4k)
Use 1k to test whether a heavily damaged crease across the face reconstructs cleanly, then run 2k or 4k when you want a print-ready family archive file.
Three Copyable Prompts for Common Vintage Photo Problems
You can paste these directly into the instruction box inside or use them with reference images in our :
1. Crease and Scratch Removal (Keep Original Monochrome)
Repair all diagonal paper creases, dust specks and edge tears across this vintage photograph. Restore natural contrast and crisp facial detail while keeping the original black-and-white tonal look. Preserve the exact facial identity, eye shape, hairstyle, clothing texture and background.
2. Faded Sepia Print to Natural Color Portrait
Restore this faded vintage family portrait and convert it to natural, realistic color. Remove yellowing, paper stains and surface scratches. Use lifelike warm skin tones, natural hair color and muted period-accurate fabric colors. Keep every person’s facial features, expression, glasses and posture unchanged.
3. Group Portrait Clarity and Background Cleanup
Restore clarity and tonal balance to this old group photograph. Fix faded shadows and sharpen facial features gently without smoothing skin into plastic. Reconstruct the damaged upper-left background wall naturally and keep all faces, outfits and poses exactly as captured.
Combining Restoration with Other Imagine AI Tools
Sometimes an archival photo needs more than surface repair:
- Remove date stamps or lab watermarks: if an old scan has a bright orange 1990s date stamp or scanner watermark in the corner, clean it first with the or .
- Uncrop tight portrait framing: if a vintage studio portrait is cropped too tightly around the shoulders for a modern frame, send the restored image to the to extend the studio backdrop seamlessly.
- Bring a restored portrait to life: once the still photo is clean, upload it as a start frame in to create a subtle, respectful 5-second living portrait with a gentle smile or slow camera push-in (see our ).
Checklist Before Saving Your Restored Archive Print
Before you download or print the final result, compare it side by side with the original scan:
- Do the eyes, nose bridge, smile lines and ears still look unmistakably like the same person?
- Were important details—wedding rings, lapel pins, uniform buttons or eyeglasses—preserved accurately?
- Are skin tones and shadows subtle rather than overly airbrushed?
- Did the repair heal the paper crease without leaving a faint diagonal blur?
Start restoring your family archives today in the , or explore all specialized retouching workflows in .
